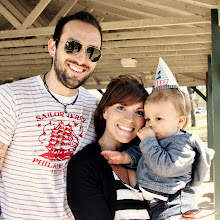
So in honor of little man turning 10 months, I've decided that this week, I'm going to share how I make his little numbered onesies. I promise it's super easy...so here we go!
Supplies:
Small scrap of fabric for number
onesie
steam a seam double stick fusible web, heat bond or other double stick fusible web
scissors
thread
marker
iron
sewing machine (optional)

Step 1: Either draw or print out the numbers you'd like to put on your onesie
Step 2: Outline your numbers onto your fusible web. If you're using the steam a seam, you'll notice that one of the papers will peel away easily. You'll want to trace your numbers onto the side that doesn't peel. Also, make sure you trace your numbers backwards.
Step 3: If using steam a seam, peel away the one layer, and lay the outline of your numbers sticky side down onto the WRONG side of the fabric as pictured below. Apply a little pressure all around the number to make sure it sticks to the fabric.
 Step 4: With the paper backing still on, cut your design out.
Step 5: Once your design is cut out, remove the paper backing, place it on your onesie, and with a hot iron, and NO STEAM, iron your numbers down.
 Now, the steam a seam packaging says that it's a permanent bond when ironed on. I find it to be more of a semi-permanent bond. But if you like the way it looks, and you're not planning on using this as an every day onesie, you can definitely stop there and leave as is. If not, go on to step 6!
Step 6: Sew your numbers onto your onesie. I said in the supplies list that sewing machines are optional, and they are. All you need to do is get some thread, a needle and hand stitch the numbers in place. However, if you have a sewing machine, I highly recommend using it, as it will take a lot less time, and the edges will look a little cleaner.
I use the zig zag stitch when outlining the numbers (Button 2 in the picture below)

Carefully go all the way around the edges of your numbers, getting as close to the edge of fabric as possible. A quick tip on maneuvering around corners: When you get to a corner, stop with your needle still in the fabric, lift your presser foot, turn your work, lower the presser foot and keep sewing until you get to the next corner. Rounded edges are a bit trickier, so just go extra slow when you get to those.

Now, just throw that onesie and an adorable little tyke, and snap away!

 *Someone woke up on the wrong side of the crib this afternoon...this was the best we could do*

 *Someone woke up on the wrong side of the crib this afternoon...this was the best we could do*
Obviously, all of these instructions apply to any other kind of design you'd like to attach to a shirt. As always, be creative, and don't get frustrated if it doesn't turn out exactly how you want it to the first time. Practice makes perfect...so get to it!
Did I mention that it snowed in Nashville...AGAIN! If I wanted to clear away the snow on my car every morning I would have stayed in Buffalo! You can go away now winter and snow :) Enjoy your Wednesday everyone!
Did I mention that it snowed in Nashville...AGAIN! If I wanted to clear away the snow on my car every morning I would have stayed in Buffalo! You can go away now winter and snow :) Enjoy your Wednesday everyone!


No comments:
Post a Comment