I'm going to call our first project Wood Slice Embroidery...
cause I don't know what else to call it.
cause I don't know what else to call it.
Supplies:
Slice of wood (can be bought at any craft store. I used a 40% coupon and Joanns or Michaels, and got mine for uber cheap!)
Design
Hammer
Nail
Drill with various drill bit sizes
Double sided tape
Embroidery floss / Yarn / Ribbon / Strips of fabric
Darning Needle
Slice of wood (can be bought at any craft store. I used a 40% coupon and Joanns or Michaels, and got mine for uber cheap!)
Design
Hammer
Nail
Drill with various drill bit sizes
Double sided tape
Embroidery floss / Yarn / Ribbon / Strips of fabric
Darning Needle

Step 1: Create your design and attach to wood slice
I used photoshop to create mine. I like the simple starbursts, and it's a really easy design for your first time. The dots in the design are where I want to drill my holes. I used double sided tape to attach to the wood slice so it would stay in place. Be sure to put the tape where there isn't a design.
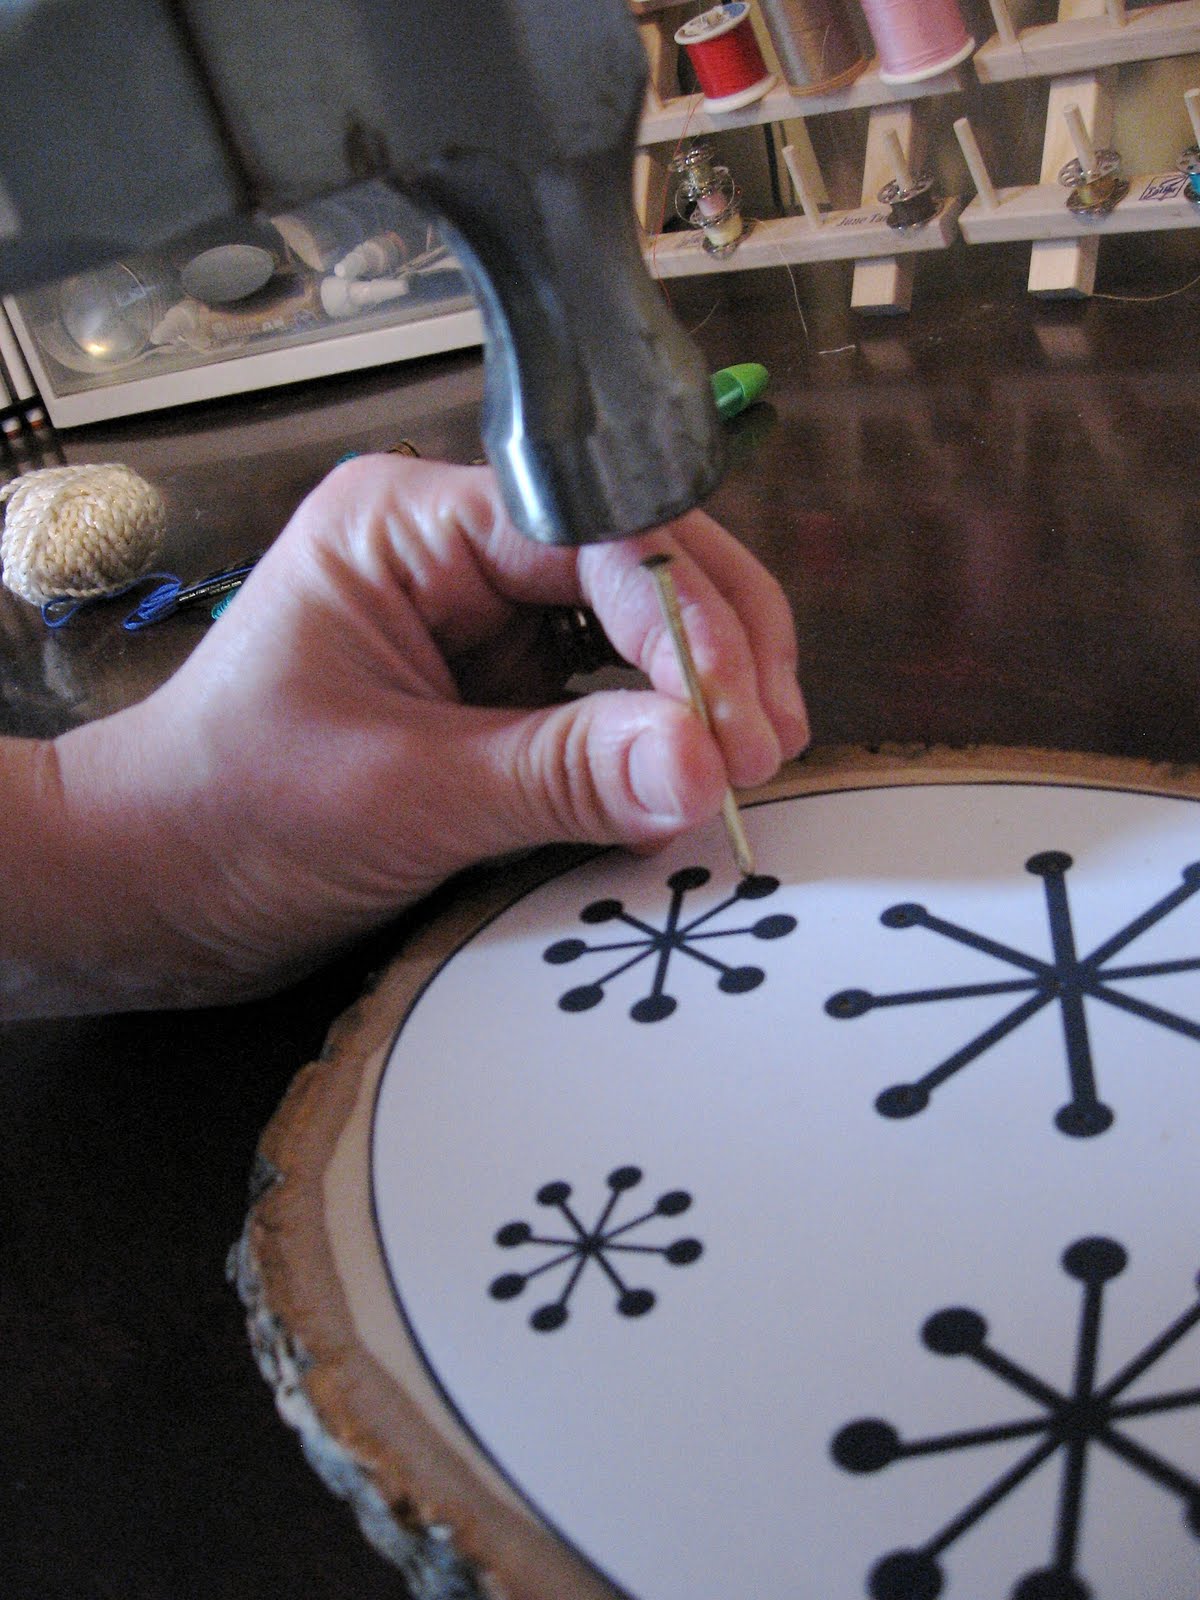
 Step 2: Transfer your design to the wood.
Using the hammer and nail, tap a small hole wherever you would like to drill a hole. It doesn't need to be deep at all. It's just a guide. Remove your paper design when you've marked all of your holes.
 Your wood should look something like this when finished
 Make sure you keep your paper design out and use it as a reference, especially if your design is a bit complicated
Step 3: Drill your holes.
I think that's pretty self explanatory...right? One thing to note though, the larger your thread/yarn/fabric strip is, the bigger drill bit you're going to need. Also, If you're going to be passing your needle through one hole multiple times (like the middle hole in this design) you're going to need to drill a bigger hole then ones where your needle is only going through once. For this project, for the embroidery floss I used 5/64th bit for the outer holes, and a 3/32nd bit for the inner. For the fabric strip (yellow starburst) and the yarn, I used a 1/8th for the outer holes, and a 9/64th for the inner. I have no idea what those number mean...I'm just writing what is written on the bit! Ha!
 Step 4: Embroider your design.
Using your darning needle and floss/fabric/yarn, start from the back of the wood, push your needle through, back to front, and then go back through the wood front to back in the next hole.
 You can really use whatever you'd like to embroider your wood slice. I used embroidery floss, 1/4 strip of fabric, and yarn. Be creative!
Tie off your loose ends when finished
Voila! It's so simple, but I love em! I definitely plan on doing this one again.

With a little prep, this would be a great craft for kids! Just pre-drill the holes, and let them sew away!
The possibilities are endless with these little ditties. You could embroider initials, sayings, drawings, anything!
I hope this little tutorial has been helpful for you! I'd love to get some feedback from you guys if you're trying this one out, and of course I'd LOVE to see pictures as well! I went ahead and created a group on Flickr "I Could Make That" . I've never actually made or joined a flickr group before, so if I'm doing something run...someone please tell me :)
Happy Crafting!

1 comment:
oh my gosh - we could do that for valentines day with my kids!!
Post a Comment