The little man turns 10 months old today. I can barely believe it every time one month goes by. Everyone always says it goes by so fast, but you really only notice it when it's actually happening to you. Addison is up to quite a bit these days. He's started pulling up to standing in his crib. I can always tell when he's standing up after a nap, cause he starts babbling away. I open the door and say "I hear a baby", and he starts grinning from ear to ear. That may be one of my absolute favorite things right now. Although he pulls up in his crib, he's having a harder time pulling up on other things. But if I stand him up next to the coffee table, he's on the move! He's successfully figured out how to go all around the coffee table, and even gets himself over to the bookshelf next to the couch and coffee table! I'm excited, yet nervous at the same time...guess it's time to start baby proofing :) We're on to stage 3 foods now, which means lots more chunks! It's been fun showing him new foods and textures, and letting him have some of our food from time to time. I know I'm completely biased, but he really is just one of the sweetest babies I've ever known. He smiles at most everyone he meets, whether it's at the YMCA, Church, or the grocery store. It's so sweet to see him interact with people, and I love it even more that he brings so much joy to the people he comes in contact with. We cannot get through the grocery store without at least a few people stopping to talk and interact with him. I love it!
So in honor of little man turning 10 months, I've decided that this week, I'm going to share how I make his little numbered onesies. I promise it's super easy...so here we go!
Supplies:
Small scrap of fabric for number
onesie
steam a seam double stick fusible web, heat bond or other double stick fusible web
scissors
thread
marker
iron
sewing machine (optional)

Step 1: Either draw or print out the numbers you'd like to put on your onesie
Step 2: Outline your numbers onto your fusible web. If you're using the steam a seam, you'll notice that one of the papers will peel away easily. You'll want to trace your numbers onto the side that doesn't peel. Also, make sure you trace your numbers backwards.
Step 3: If using steam a seam, peel away the one layer, and lay the outline of your numbers sticky side down onto the WRONG side of the fabric as pictured below. Apply a little pressure all around the number to make sure it sticks to the fabric.

Step 4: With the paper backing still on, cut your design out.
Step 5: Once your design is cut out, remove the paper backing, place it on your onesie, and with a hot iron, and NO STEAM, iron your numbers down.

Now, the steam a seam packaging says that it's a permanent bond when ironed on. I find it to be more of a semi-permanent bond. But if you like the way it looks, and you're not planning on using this as an every day onesie, you can definitely stop there and leave as is. If not, go on to step 6!
Step 6: Sew your numbers onto your onesie. I said in the supplies list that sewing machines are optional, and they are. All you need to do is get some thread, a needle and hand stitch the numbers in place. However, if you have a sewing machine, I highly recommend using it, as it will take a lot less time, and the edges will look a little cleaner.
I use the zig zag stitch when outlining the numbers (Button 2 in the picture below)

Carefully go all the way around the edges of your numbers, getting as close to the edge of fabric as possible. A quick tip on maneuvering around corners: When you get to a corner, stop with your needle still in the fabric, lift your presser foot, turn your work, lower the presser foot and keep sewing until you get to the next corner. Rounded edges are a bit trickier, so just go extra slow when you get to those.

Snip off all of your loose threads and you're finished!

Now, just throw that onesie and an adorable little tyke, and snap away!

 *Someone woke up on the wrong side of the crib this afternoon...this was the best we could do*
Obviously, all of these instructions apply to any other kind of design you'd like to attach to a shirt. As always, be creative, and don't get frustrated if it doesn't turn out exactly how you want it to the first time. Practice makes perfect...so get to it!
Did I mention that it snowed in Nashville...AGAIN! If I wanted to clear away the snow on my car every morning I would have stayed in Buffalo! You can go away now winter and snow :) Enjoy your Wednesday everyone!

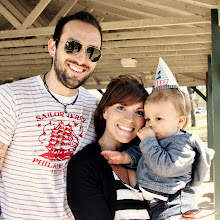
 Our little man is 1!!! I swear that both Russ and I thought he looked different when he woke up last Saturday. He looked more toddlerish (if that's even a word). And he has been up to so much! About a week before his birthday, he started to crawl, took his first steps, perfected waving bye bye, blows kisses, gives kisses and hugs, and started to grab his belly when you ask where it is. It's as if he knew that he was about to turn 1, and realized he needed to get movin on these milestones :) He's developing quite the personality, quite the flirt when it comes to the ladies. He gets all shy and crinkles his nose...SO CUTE! He loves to be outside...definitely his mom and dad's son when it comes to that! It's hard to describe just how much I love this little man of ours. Sometimes I just can't stand it!
 I am SO glad we decided to do this! It's amazing how much they change in just a short year!